tagline

life is beautiful
Showing posts with label before and after. Show all posts

Wednesday, October 26, 2011

Before and After #5: Green Couch Redo


One happy yard sale-ing morning in September, 2009, I stumbled upon this beautiful Ethan Allen couch for $15.  It smelled like unkempt cats and was sticky (as if it had been kept in a frequently-fried-food environment??), but it was structurally sound and had a sightly form so I scooped it up (with some muscley help, of course.).

At first I thought the foam could be re-used, but it was ultimately UNsalvageable, so I stripped it off and started cleaning (scrub, bleach, scrape, scrub, scrub, scrub and finally a little restore-a-finish wipe-down):


We moved it inside where it housed every single available throw pillow for FOR-EV-ER while I decided what to do with it!


At one point I so despaired of knowing what to do with it that I tried to sell it on craigslist...


THANKFULLY, it was at around this time that I got completely fed up with my beige on beige on beige living room color scheme AND this fed-up-ness coincided with the relocation and liquidation of my local JoAnn's!  So long story short: my couch budget suddenly looked a LOT bigger, and after much deliberation, I yanked my craigslist ad, ordered seat cushion foam (very, very happy with the Foam Factory's customer service, prices and quality, and no, they didn't pay me to say that. ;) and snatched up some delicious deep-discount grass green fabric (in a soft but sturdy denim, believe it or not!).


That was 6 months ago, and even though I had a great plan, I was still frozen about how to execute it, until..... I came across Creative Little Daisy's excellently clear tutorial on Sew, Mama, Sew! It gave me courage and understanding on how exactly to plan out the zippers...  so I did it! (Although I skipped the piping, not out of fear mind you {I was afraid of them there zippers, though!} but out of laziness practicality...)


And I used the previous over-sized-throw-pillows-turned-too-flat-seat-cushions as foundational back cushions in the same color, plus I recovered a few of the other stand-ins for a pop of color!


What do you think? Doesn't it liven up the space?!

 
Well, these little chickens help in that department too.... Yay!

[I think ultimately this couch would be perfect paired with sky blue walls... Check out the color combo on my Pinterest.]

Thursday, August 11, 2011

Before and After #4: Past Projects: Hand-painted Skirt from 2008


In the spring of 2008, I bought a skirt that turned out to be a little blah, a little too similar to another skirt I also liked to wear, so...after a couple of weeks of working up the courage, I spiced it up a bit!


 I used this easy-to-work with "wonder paint" from Jacquard Textile Color, and it turned out beautifully.  After a simple heat set (read: iron the skirt wrong-side-out once before washing), the paint is permanent.  I am still wearing this skirt 3 years later with virtually no fading!

 Here is the skirt in the beginning...


I decided which flowers to paint in which way so that the pattern would be even, gathered my support team, and got to work.


I'm so in love with blue and green together!  Sky blue and grass green... turquoise and lime.... YES!


 You know, you could do this too!  I'm certainly no artist, but it was a fun, relaxing craft that I can still enjoy years later.

Friday, April 22, 2011

Before and After #3

A dear friend handed a bunch of lovely pillows down to me several years ago.... and I'm feeling the need to refresh some of them, and this is the first one I tackled:


I wanted to re-use the cording or welting for the edges, so I ripped it out as I took off the cover...


I was unpleasantly surprised to find this lump of smushy "fill" inside the pillow!  In order to help the new cover have a smooth look, I covered this "filling" with the remnant of a much-loved crib sheet.  I measured the old cover and used it as a pattern for both the insert and the new cover...


I also made my own bias tape to cover the piped edges of this pillow (from scraps I had from my little lady's pleated crib skirt), following this method (without the folding/ironing step).  (I'm not 100% sure that bias tape is really necessary.  It's a pain to make!  Yes, I do understand the theory, but.... before I knew I was "supposed" to use bias tape, I just used a rectangle of fabric and clipped the edges of any curves, and it worked like a charm!) I used the old casing as a pattern to know how much bias tape I needed for my new piping.


I created my piping and sewed it into my cushion cover (you can read about one way to do this here), turned my cushion cover right-side-out, stuffed it and sewed up the open side nice and tight. :)


Here is the finished pillow, along with a sneak peek or two of some of  upcoming projects.....


Lovely, spring-y and refreshed. Ahhhhhhh....
Now what is going to happen to this messy couch?? 


Here is a super-secret-sneak-peek of its "before."  It's an Ethan Allen couch and it cost $15 at a yard sale.  Now let me just say that if a picture could carry a smell, you'd never come back to this blog!

Tuesday, April 19, 2011

Before and After #2

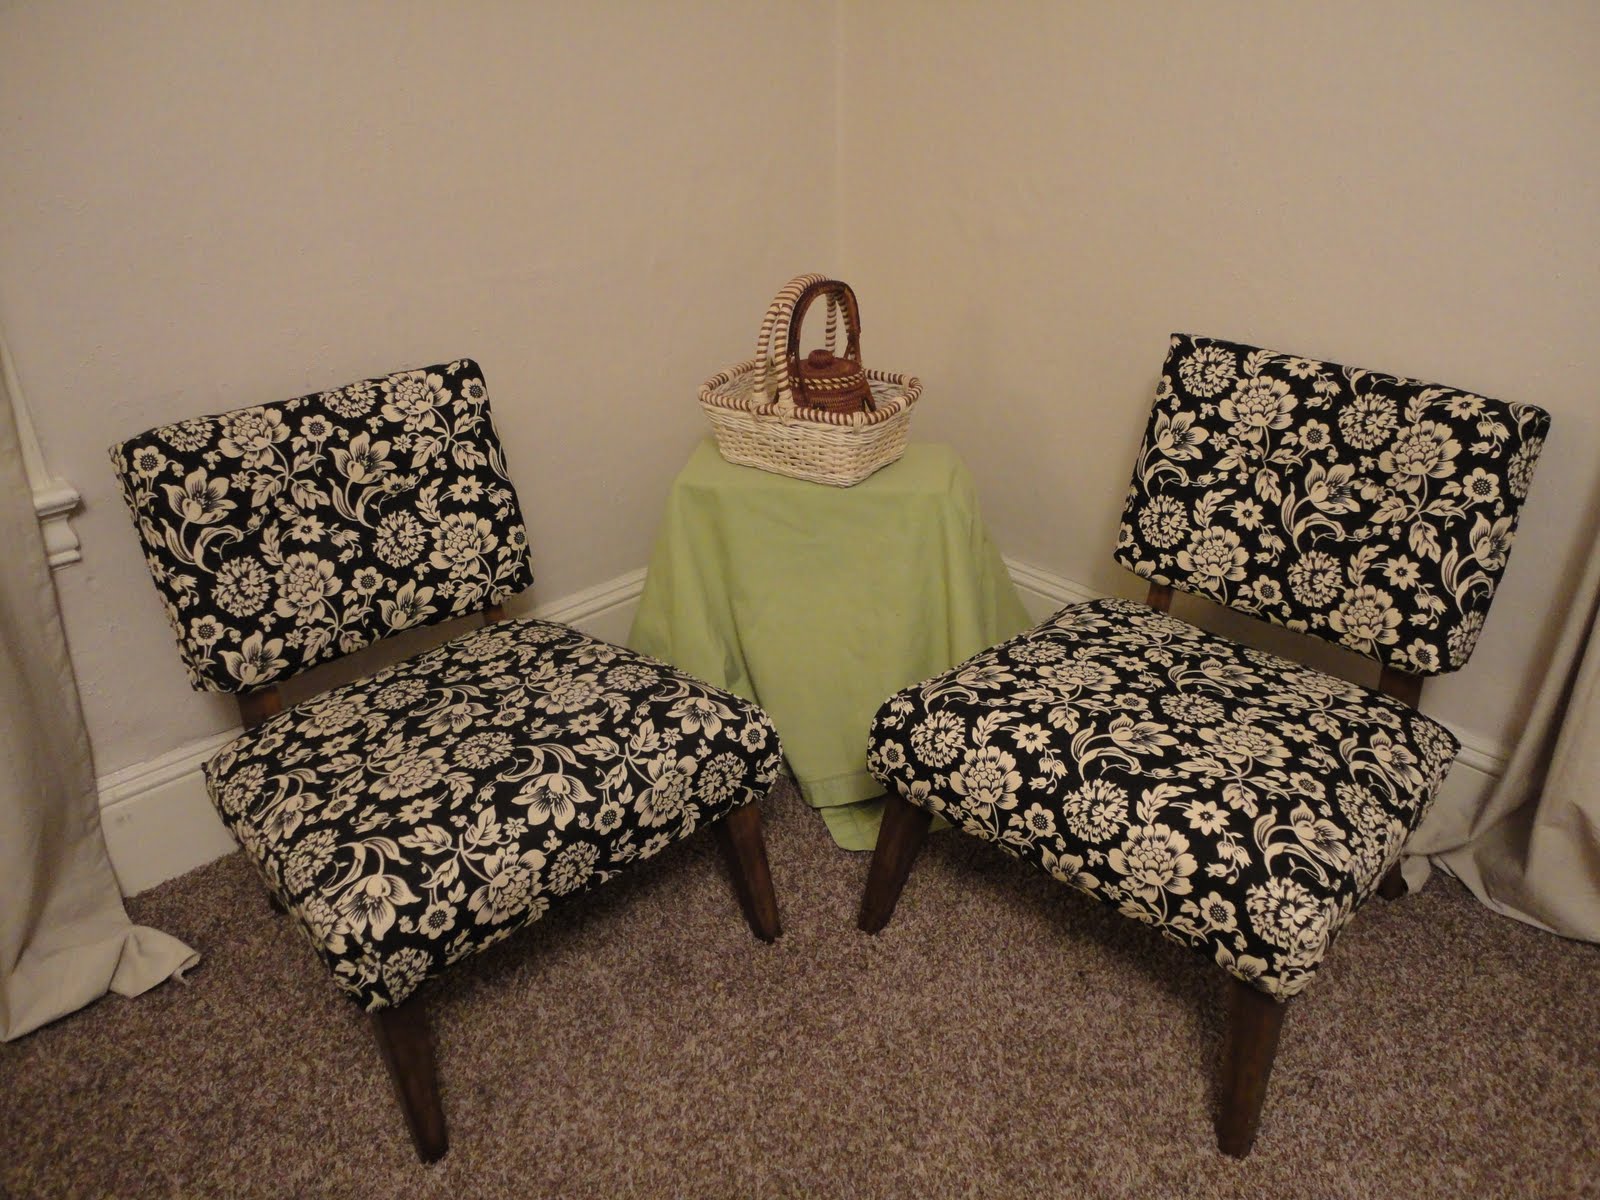
This project rates... out of anything I've ever done.... as the one I disliked the MOST while I was doing it!
BUT, this project also rates as the one I enjoy the MOST.... out of anything I've ever done.... EVERY SINGLE DAY!

Would you believe that I turned these:


Into these?!


I'm proud to say that the project only cost me about $20 total!  The pair of chairs was free, and I re-used the padding, the cording.... even the upholstery nails.  This project was done on a dime and completely upcycled.  Yay!!!!

I sure learned a lot!  But it will be a while before I tackle this kind of re-upholstery again. Just bein' honest. ;)

They look better in the day time... maybe I'll have to add some daytime photos....  :)

Here are a few process pictures - I was going to do a full-blown tutorial, but I'm sure there are good ones already out there somewhere AND I'm sure there are easier ways to do most of what I "figured out."  But for what it's worth:


Monday, April 11, 2011

Before and After #1

In 2009, we moved into the cutest little house, and while I can't do a lot of painting inside to personalize it, I was able to freshen up the backyard fence.  
What a fun project!! And it's been so rewarding especially during the rainy season, when it's been a beacon of bright color popping in the gloomy greyness. :)  I love it in the snow too.....

BEFORE:


AFTER:

BEFORE:
 

AFTER: